Smart tools, useful content, and things worth knowing
How to Fix a Curved or Sagging Roof Yourself: DIY Guide to Installing Attic Rafter Vents
on
If your roof has started to develop a noticeable curve, it may be an early sign of structural sagging. This issue is common across Canada and the United States, especially in regions that experience heavy snow, humidity, or large seasonal temperature swings.
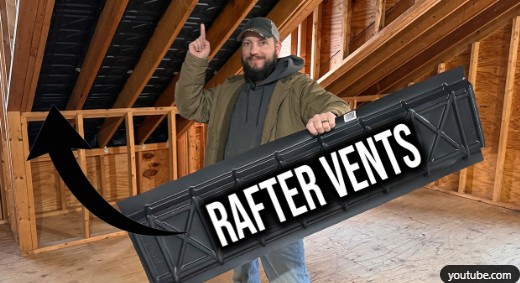
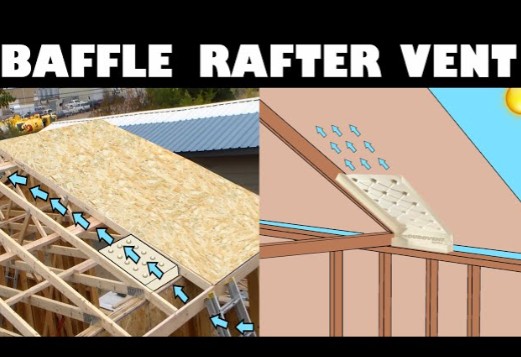
Before assuming the worst, it’s important to know that some preventive DIY measures such as installing attic rafter vents (also called ventilation baffles) can improve airflow in your attic and reduce moisture buildup that may contribute to long-term structural stress.
This guide explains how homeowners in North America can approach the issue safely and effectively.
Important: If the sagging appears severe or continues to worsen, a professional inspection is strongly recommended.
Understanding the root cause is the first step before attempting any DIY repair.
Several factors can lead to roof sagging in homes across Canada and the U.S.:
Poor attic ventilation
When warm, humid air becomes trapped in the attic, moisture can accumulate on wood framing and insulation. Over time, this can weaken rafters and promote mold growth. Older homes in particular often lack proper ventilation systems.
Heavy snow or water loads
In colder climates throughout North America, snow accumulation during winter can place substantial weight on a roof structure. If the roof was not designed to handle the load, gradual sagging can occur.
Material deterioration
Wood rot, insect damage (such as termites in warmer regions), or aging building materials can gradually weaken rafters and trusses.
Structural design limitations
Some roofs sag because rafters were undersized, spaced too far apart, or missing adequate support during construction.
Many homeowner discussions online point out that improving attic ventilation with rafter vents can be a useful preventive step before exploring more complex structural solutions.
Inspect the Roof Before Starting a DIY Repair
Before beginning any project, inspect your attic carefully.
Bring a flashlight and wear a protective mask while checking for:
Visible sagging from inside the attic
Signs of moisture or mold
Damaged or weakened rafters
Spacing between rafters (typically 16 to 24 inches in North American homes)
If the sag exceeds about 1 inch (2–3 cm) or you hear structural cracking sounds, stop and consult a contractor or structural engineer.
For minor cases, improving attic ventilation may help stabilize conditions by reducing moisture and temperature fluctuations.
Materials Needed to Install Attic Rafter Vents
To install attic rafter vents yourself, you will typically need:
Attic rafter vents (polystyrene or cardboard ventilation baffles)
Staple gun or roofing nails
Dust mask, gloves, and safety glasses
Ladder and headlamp or work light
Optional additional attic insulation
These materials are widely available at home improvement retailers such as Home Depot, Lowe’s, Menards, RONA, or Ace Hardware.
Typical project cost: $50 to $200, depending on the size of the attic.
Share:
Step-by-Step Guide to Installing Attic Rafter Vents
For most homes, installing attic vents takes 2 to 4 hours.
1. Prepare the attic
Clear any debris and make sure the soffit vents (the air intake vents under the roof edge) are not blocked by insulation.
2. Measure and trim the vents
Trim the ventilation baffles if necessary so they match the length of the rafter cavity.
3. Insert the vents
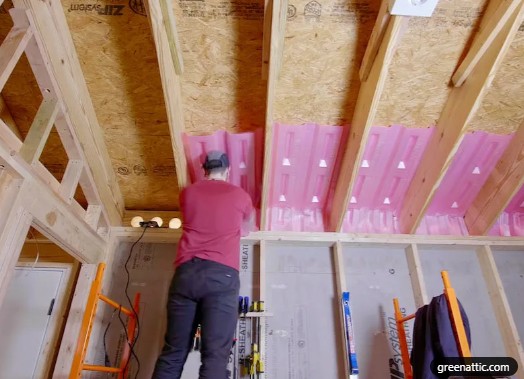
Place one vent between each pair of rafters, starting at the soffit and extending upward along the roof deck.
Leave 1–2 inches of airflow space above the vent so air can move toward the roof ridge.
4. Secure the vents
Staple or nail the edges of the vents to the rafters approximately every 6–8 inches.
Make sure the vent creates a clear air channel rather than blocking airflow.
5. Check the overall ventilation system
If your roof does not have ridge vents, roof vents, or gable vents, consider installing them or ensuring they are clear of obstructions.
6. Add insulation if needed
If you plan to improve insulation, place it behind the vents without compressing the airflow channel.
Better ventilation can help reduce attic humidity and may relieve minor structural stress on the roof system.
Safety Tips and Common Mistakes to Avoid
DIY roof repairs can involve real risks, including falls, dust exposure, and structural instability.
Follow these safety precautions:
Work with another person whenever possible
Avoid stepping directly on weak rafters
Use boards to distribute your weight across joists
Wear proper safety equipment
Common mistakes include:
Blocking soffit vents with insulation
Assuming ventilation alone will fix serious structural sagging
Proper ventilation helps improve attic conditions, but it cannot repair major structural damage.
When to Call a Professional
If the roof sagging is significant, attic vents alone will not solve the problem.
You should contact a licensed roofer or structural engineer if:
Sagging exceeds 2 inches (about 5 cm)
Roof leaks are present
Structural wood damage is visible
The house was built under outdated building standards or has had previous structural modifications
In some regions of Canada and the United States, homeowners may also qualify for energy efficiency or home improvement rebate programs that support ventilation and insulation upgrades.
Improving attic ventilation by installing rafter vents can be a practical first step toward protecting your roof structure. For many homeowners across North America, it’s an affordable way to reduce moisture buildup and extend the lifespan of their roof.
The key is to start with a careful inspection and recognize when a simple DIY improvement should be combined with professional advice.
To provide the best experiences, we use technologies like cookies to store and/or access device information. Consenting to these technologies will allow us to process data such as browsing behavior or unique IDs on this site. Not consenting or withdrawing consent, may adversely affect certain features and functions.
Functional
Always active
The technical storage or access is strictly necessary for the legitimate purpose of enabling the use of a specific service explicitly requested by the subscriber or user, or for the sole purpose of carrying out the transmission of a communication over an electronic communications network.
Preferences
The technical storage or access is necessary for the legitimate purpose of storing preferences that are not requested by the subscriber or user.
Statistics
The technical storage or access that is used exclusively for statistical purposes.The technical storage or access that is used exclusively for anonymous statistical purposes. Without a subpoena, voluntary compliance on the part of your Internet Service Provider, or additional records from a third party, information stored or retrieved for this purpose alone cannot usually be used to identify you.
Marketing
The technical storage or access is required to create user profiles to send advertising, or to track the user on a website or across several websites for similar marketing purposes.